This is how to cook on the Big Green Egg
Thank to its design, the unique ceramic and wide temperature range – from 70 to 350°C – this kamado is a truly complete outdoor cooking device. The Big Green Egg is suitable for many cooking techniques, including smoking, roasting, steaming, baking and grilling. Nothing is too outlandish! Push your culinary boundaries and surprise yourself and your guests with all the delicious dishes you can create on a Big Green Egg.
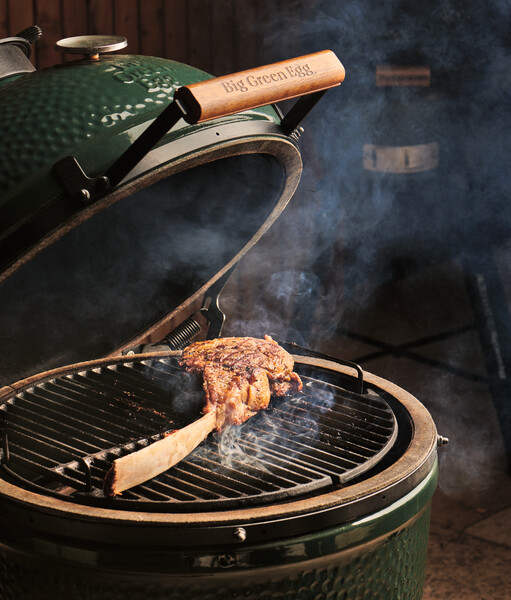
Cooking technique Grilling
When the Big Green Egg was introduced 50 years ago, people mainly used it for grilling. It was only later that the EGG was also used for many other cooking techniques, partly due to the development of various accessories. However, grilling remains an essential basic technique. Grilling is a quick method that uses a relatively high temperature and offers more possibilities than you might think. It is the perfect technique for preparing dishes, such as a juicy steak, a tasty vegetable skewer or delicious fish. In general, grilling is done at a temperature between 180 and 250°C. The high temperature will give the meat or poultry a nice brown exterior, while keeping it juicy and tender on the inside. The ingredients are usually cooked on the grid, directly above the heat of the charcoal. This is also known as the direct method or direct grilling method. Lid closed During grilling, the ingredients cook thanks to the glow of the charcoal (radiant heat), the heat of the grill (contact heat) and through convection heat. Convection heat includes the airflow within your EGG and the reflection of heat from the ceramic. It is therefore important to close the lid after each action. Aside from keeping in the convection heat, it allows you to perfectly control the temperature inside the Big Green Egg and maintain a constant temperature. A closed lid also ensures good humidity inside the EGG, keeping your ingredients juicier, even when grilling. You should also make sure to never completely cover the surface of the grid to avoid obstructing airflow. The best grid You can grill just fine on the Stainless Steel Grid, but the Cast Iron Grid is made for this job. A cast iron grid creates better grill marks as it has the ability to absorb heat well and release it to the ingredient. In a very concentrated manner thanks to the V-shape of the bars of the grid. Don't be tempted to flip your grid to create wider stripes, the heat will be less concentrated. Always make sure that the Cast Iron Grid is heated to the desired grilling temperature for about 10 minutes before grilling. This allows the grid to absorb sufficient heat. Indirect grilling There is an exception to every rule: aside from the most commonly used technique of direct grilling, you can also grill indirectly. This method is not used very often, but can be rather useful. Here, you place the convEGGtor, where applicable with a Drip Pan on top, under the Cast Iron Grid to block the direct radiant heat. You place the ingredient on the grid, to grill and cook it slowly with the EGG's oven-like properties. Cooking this way takes a little longer, but it prevents flames resulting from fat dripping onto the charcoal. In addition, indirect grilling is particularly suitable for grilling delicate ingredients such as fruit that do not need to cook, but are enhanced by grill marks. The reason for grilling fruit is to caramelise the sugars that are naturally present. The fruit becomes delightfully sweet and tastes even better! Reverse sear method You can grill almost everything, as long as the ingredients are not too thick or too big. After all, one is not supposed to burn the outside or prevent the inside from being cooked. If the steak is more than 5 cm thick, you must use a combination technique: the reverse sear technique. You first cook the meat indirectly with the convEGGtor and the Stainless Steel Grid to a few degrees below the desired core temperature. Then you grill it directly on a (pre-heated!) cast iron grid to create those beautiful and flavourful grill marks. GRILLTIPS • Want to grill smaller ingredients, such as shellfish and diced vegetables? Just insert the Stainless Steel Grid and place the Half Perforated Grid with the ingredients on top. Then, you don’t have to worry about them falling between the bars of the Stainless Steel Grid and you can just remove the Half Perforated Grid from your Big Green Egg in one easy movement. • Have you grilled meat or poultry? Cover it loosely with aluminium foil and leave to rest for 5-10 minutes. It will lose much less moisture during carving. • Fish and certain vegetables like chicory and sliced little gem are quite delicate products. So you need to grease the grid and your ingredients with a neutral vegetable oil shortly before you start grilling.

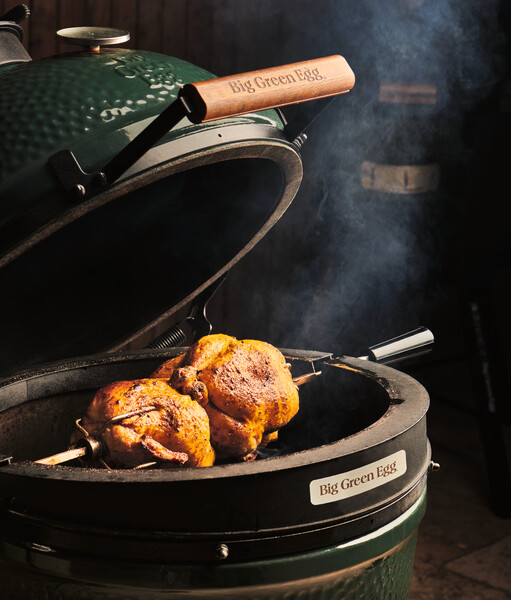

Cooking technique Roasting
Roasting and grilling are two cooking techniques that are often confused, while there are major differences. Smaller or sliced ingredients are grilled using contact heat from the cast iron grid. Larger ingredients should be roasted, and this involves little or no contact heat. Roasting is a technique which involves cooking large cuts of meat or game, whole poultry or fish or, for example, entire vegetables like a celeriac or a cauliflower at a fairly high temperature, giving them a nice and even brown colour. When cooking meat, fish, game or poultry, you bring the ingredient to a specific core temperature, whereas vegetables are roasted until they have the desired bite. You can even roast a whole pineapple, which causes the sugars naturally present in the pineapple to caramelise, creating a delicious flavour. The Big Green Egg's roasted flavour is an added bonus! Different ways You can roast in two different ways: by using the EGG as an oven or with the Rotisserie. In both cases, you usually fire up the Big Green Egg to a temperature between 175 and 200°C, which will colour your ingredients beautifully. For large roasts, you can also choose to cook at a lower temperature of around 130 to 140°C first, to roast the ingredient or dish more slowly at first. Towards the end of the cooking time, increase the temperature to the aforementioned 175 to 200 °C to give the product a nice colour and – in some cases – a crispy crust. Roasting like in an oven For traditional roasting in the Big Green Egg, when the charcoal is smouldering, place the convEGGtor with a Drip Pan on top and insert the Stainless Steel Grid. If you find it convenient, you could also use the Ribs and Roasting Rack on your grill with the product inside. The convEGGtor will ensure that there is no direct radiant heat from the charcoal and only partial contact heat (the heat from the grid) because the stainless steel stores and releases less heat than a cast iron grid. Your product will cook and brown largely thanks to the airflow in the EGG and the reflection of heat from the ceramic. That's why we call this an indirect cooking technique. Something delicious on the side Use this method of roasting to make a delicious piece of pork belly, a roulade, roast beef, a venison rack, beer can chicken or fruit and vegetables, as mentioned earlier. With beer can chicken, there is actually no contact heat involved at all because the chicken is not touching the grill. If you want to fry potatoes or vegetables in a skillet at the same time as roasting but lack the space on the grill, there is a simple solution. Just add the 2-Piece Multi Level Rack to expand the capacity of your EGG. Place the skillet on this raised grid and while your main ingredient is roasting, so you can make something delicious on the side. Roasting with the Rotisserie The ultimate method of roasting is to cook your product with the Rotisserie. With this technique, you generally roast the ingredient directly over the smouldering charcoal, which adds an even more potent roasted flavour. Thanks to the Rotisserie's rotation, your product is not continuously exposed to the radiant heat of the glowing charcoal, eliminating the risk of burning as long as you monitor the temperature. Don't want to take any chances? Then, even with this method of roasting, you can place the convEGGtor with a Drip Pan on top to act as a buffer between the charcoal and the Rotisserie. When roasting with the Rotisserie, you tie up your pork belly, for example, into a roulade that you thread onto the spit and clamp down with the spit forks. But you can also use the Rotisserie to cook foods such as different slices of vegetables, shawarma, gyros from chicken thigh or pork neck slices. Combined with the matching Tumbler Basket, the Flat Basket can also be used to grill smaller pieces of vegetables, chicken wings and even nuts, or roast a whole fish.
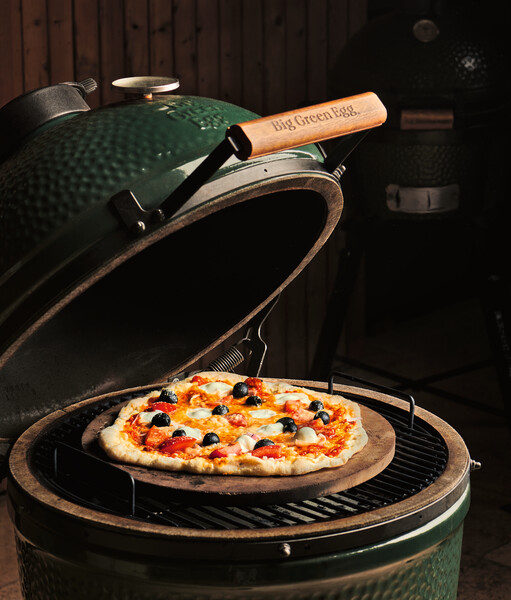
Cooking technique Baking
Are you in that baking mood? Go ahead and light the charcoal in the Big Green Egg. Because whatever cooking technique you use the EGG for, the result is always to die for. Wondering how to use the Big Green Egg for baking? Let us explain. As you may know, the Big Green Egg is very easily converted into a convection oven by inserting the convEGGtor before placing the grid in the EGG. That makes for a charcoalfired oven that cooks evenly and adds extra flavour. The addition makes the Big Green Egg even more versatile. The EGG as an oven It is the perfect setup for baking bread, quiches, pies, desserts, pizzas and flammkuchen at temperatures between 180°C and 300°C. Because this technique involves placing the convEGGtor inside your EGG like a heat shield, there is no direct radiant heat from the charcoal. That’s why we call it an indirect cooking technique. The reflection of heat through the ceramic and the airflow within your EGG ensure that your ingredient or dish is baked to perfection. Inserting the convEGGtor It is important that the ceramic in your Big Green Egg has fully absorbed the heat before baking. Only then will you make the most of the EGG’s ceramic heat reflection. So wait until the Big Green Egg - after lighting - has reached the correct temperature, then insert the convEGGtor and then the Stainless Steel Grid in the EGG. Keep in mind that when the convEGGtor is inserted, the temperature of the EGG will drop by about 50°C. So if you want to bake your dish at 180°C, first bring the temperature up to around 230°C and then place the convEGGtor and the Stainless Steel Grid. The temperature will then drop to approximately 180°C. An exception is baking at higher temperatures. If baking at higher temperatures, the convEGGtor and the grid can be inserted once the EGG has reached a temperature of 200°C, as the ceramic will have heated up sufficiently. After inserting the convEGGtor and the grid, bring the EGG to the desired temperature. Using the Baking Stone Furthermore, the Baking Stone, also known as the pizza stone, can be used to create a stone oven or it can be used as an extra heat shield. When using it as a stone oven, bake with a hot Baking Stone. To use the Baking Stone as an extra heat shield, bake with a cold stone. We’ll explain the difference below. Baking with a hot Baking Stone For short, hot baking like making pizza and flammkuchen, as well as for stone-baked bread, the Baking Stone must be preheated. This will create the aforementioned stone oven and give your pizzas, flammkuchen or bread a nice crispy base or crust. Place the stone on the grid right after inserting the convEGGtor and Stainless Steel Grid. Then let the stone warm up for at least 20 minutes before baking. That way, you can be sure the Baking Stone will be hot enough. Baking with a cold Baking Stone For longer preparations at temperatures around 200°C, like cakes, pies, oven desserts and quiches, the Baking Stone forms an additional heat shield to prevent the bottom of your dish from burning. So, in these cases, once the EGG - including the convEGGtor and Stainless Steel Grid - has reached the right temperature, place a cold Baking Stone in the Big Green Egg. Then place your cake, pie or baking tin directly on the stone. This will allow the Baking Stone to heat up slowly and provides extra protection to ensure that the bottom of your dish will cook gradually, without burning. Getting started Are you curious to see the value of the Big Green Egg can add to your baking? Give it a try! Choose one of your favourite oven recipes to bake in the EGG and taste the difference!

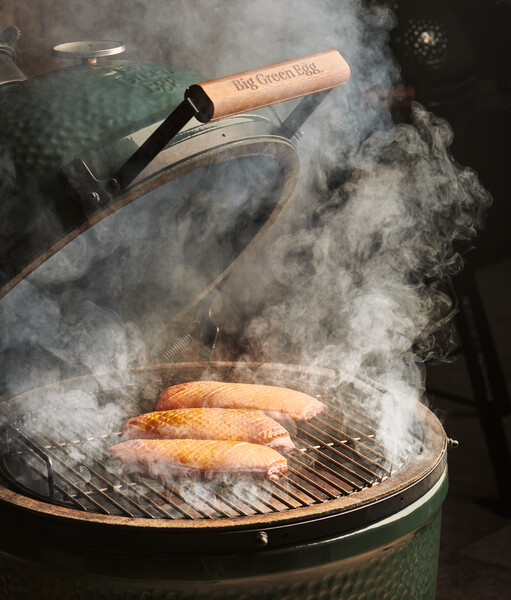

Cooking technique Smoking
Fancy homemade hot-smoked salmon, delicious smoked duck breast or pulled pork? You can make this and more in your Big Green Egg! Because thanks to the lid, you can very easily transform an EGG into a smoker to add even more flavour to your ingredients. Smoking once arose out of necessity to extend the shelf life of ingredients. In addition, the food was directly cooked and took on a delicious flavour. Originally, smoking ingredients was never intended as a flavour enhancer, although it did add a delicious flavour to food. That is why smoking remains a popular cooking technique today, with wood being used as a natural flavouring. Smoking with chips and chunks To use your Big Green Egg as a smoker, you need smoking wood in the form of Wood Chips, Wood Chunks or a Wooden Grilling Plank (smoking board, see smoking tips). For smoking sessions with chips and chunks, the setup in your EGG is the same. When the EGG is at the right temperature, sprinkle a handful of Wood Chips on the glowing charcoal or put two or three Wood Chunks on top. Then you insert the convEGGtor with a Drip Pan on top to catch any dripping fat and to keep your convEGGtor clean. Next, place the Stainless Steel Grid in the EGG with the ingredient you want to smoke on top. If you’re smoking meat such as pork belly, a rump or duck breast, lay it fat-side up, so that the delicious flavour of the melting fat soaks into the meat. The temperature of the EGG When smoking with chips and chunks, in most cases you need to maintain a temperature between 70 and 120°C. Thinner ingredients that require a lower core temperature, or ingredients like fruit that do not need to be cooked, should be smoked between 70 and 90°C. This way, the smoke is given time to do its job without the ingredient cooking too quickly. Larger cuts like pork neck or shoulder for pulled pork, or brisket, for example, can be smoked at higher temperatures between 90 and 120°C because they take longer before they are done. By the way, when heating the EGG to the right temperature, keep in mind that the temperature inside the EGG drops by about 40 to 50°C when the convEGGtor is inserted. So you’ll need to heat the EGG to a higher temperature than the temperature at which you want to smoke Chips or chunks? But how do you decide whether to use Wood Chips or Wood Chunks? The answer is quite simple. Chips are smaller and are therefore used for shorter smoking sessions of up to around half an hour. They are ideal for smoking and cooking fish and poultry and thinner pieces of meat, but also to smoke other ingredients such as couscous. If you are planning a longer smoking session with a large piece of meat, then opt for chunks,simply because they give off smoke for a longer period of time. You can soak the chips if you want, but it’s not strictly necessary. Sometimes, chips are soaked to prevent them from catching fire. But if you close the lid of the EGG immediately, the flames will quickly extinguish due to the low oxygen supply. Playing with flavour In addition to the different types of smoking wood, there are also different flavours, depending on the type of wood. Wood from fruit trees, such as apple wood and cherry wood are rather mild in flavour, whereas mesquite and hickory give off an intense smoky aroma. The guiding principle is that ingredients with mild flavours are best combined with a mild type of wood. On the other hand, ingredients that contain strong flavours, whether or not through a rub or marinade, will not be overpowered by smoking wood that imparts a more intense flavour. Pecan generally suits all ingredients. Although we offer some general guidelines here, there’s nothing stopping you from playing around with the flavours of the different types of smoking wood. Just experiment and you will soon discover your favourite combinations!
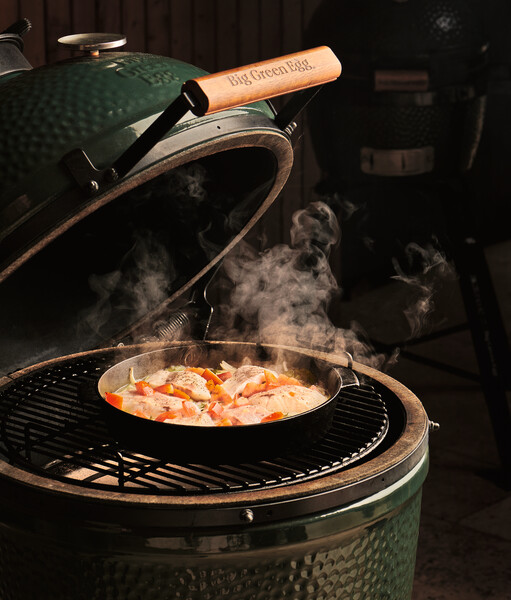
Cooking technique Steaming
Want to steam food? You need a special steam oven or a steam pan for that, right? Not if you have a Big Green Egg because steaming is one of the many cooking techniques that are possible with an EGG. But what makes an EGG so suitable for steaming and how do you actually use this technique? Steaming in a Big Green Egg is easier than you might think and it has several advantages over steaming in a steam oven or steam pan. For starters, you need to clean a steam oven more often than a conventional oven and, when steaming in a pan, you either need a special pan or an extra steamer basket. When steaming in the Big Green Egg, none of this applies. But the biggest advantage of steaming in the EGG is the delicious flavour your ingredients acquire. Tender and juicy Steaming food just means cooking at high humidity in a hot environment. Thanks to the EGG's lid and ceramics, the humidity in this kamado is already high, keeping ingredients nice and juicy. Steam them in your EGG and you create even higher humidity with an even juicier result. The easiest way to do this would be to place a Drip Pan with boiling water or some other liquid on the convEGGtor underneath the grid. But this is actually not that effective. Instead, there is a much simpler way that gives a far better and tastier result. Direct or indirect method Steaming in your Big Green Egg is a direct or indirect preparation for which, besides your ingredients, all you need is the included Stainless Steel Grid and a Cast Iron Skillet (or a Dutch oven). This process uses the airflow within your EGG and the reflection of heat through the ceramic and, when cooking directly, the glow of the charcoal (radiant heat). There is no direct contact heat with the ingredient you are steaming, which means it will cook slowly, despite the high starting temperature. This is how you do it When steaming, you should maintain an initial temperature of around 220°C. While the EGG is warming up, cut firm vegetables, such as root vegetables or cabbage, into equal strips so that they are cooked at the same rate. Or you could use samphire to serve with fish. Once the EGG reaches the desired temperature, place the skillet containing the evenly distributed vegetables on the grid. Pour in a layer of about 1 centimetre of a cold liquid of your choice and place your main ingredient on top of the vegetables. Just make sure the main ingredient is not touching the liquid. If the moisture is touching the main ingredient, it means you are poaching it rather than steaming it. Finally, close the lid of the EGG and open the air regulator and the rEGGulator a little further. The extra oxygen supply makes the charcoal glow brighter, creating more radiant heat and rapidly heating up the liquid in the skillet. After about 6 minutes, the liquid will have reached a temperature of 80°C, causing steam to develop. While cooking with this method, open the lid of the EGG as little as possible to prevent steam from escaping. Packed with flavour The cooking time required for your ingredient depends on what you are steaming. A piece of fish fillet will be done after around 10 to 15 minutes, while a chicken fillet will need around 25 minutes. Which liquid should you use? That’s entirely up to you. Water is always a good choice. But – again depending on your main ingredient – you could use white wine, fish or poultry stock or even a dash of whisky. One thing is for sure, the result will be tender, juicy and flavourful. Steaming causes the ingredients to absorb each other's flavours and those of the charcoal. So not only are your main ingredient and the vegetables packed with flavour, but the liquid is full of flavour too. Serve your dish with a garnish with a bite to balance out your culinary creation.